
You put both of your AirPods in your ears, only to discover that one of them is dead silent. There's nothing more annoying than trying to jam out to some good tunes, only to have one AirPod earbud conk out on you.
Thankfully, there are some quick fixes to getting both of your Apple AirPod earbuds up and running again. Here are some steps you can take to fix your Apple AirPods.
Make Sure Your AirPods Are Completely Charged
If only one of your AirPod earbuds is working, chances are it has something to do with your AirPods' battery life. Speaking from personal experience, it’s actually quite common for one of your AirPods' battery life to be nearly full, and the other to be completely drained. This happens because only one of your AirPods acts as both a microphone and a speaker when in use. Whichever AirPod you put in your ear first will activate as the microphone and speaker, so its battery life will drain more quickly because of it.
You can improve battery life on your AirPods by alternating what earbud you put in your ear first. Try to share microphone and speaker responsibilities between the two wireless earbuds rather than shouldering all the responsibility on a single earbud.
Always Keep Your AirPods in Your Charging Case
AirPods' battery life will drain super quickly if they’re frequently left outside the charging case. It’s a good rule of thumb to always keep your AirPods in your charging case when you’re not using them, and keep your charging case plugged in, as well. Plus, doing so will help you reduce that feeling of panic when you have your charging case but have no idea where your AirPods ran off to.
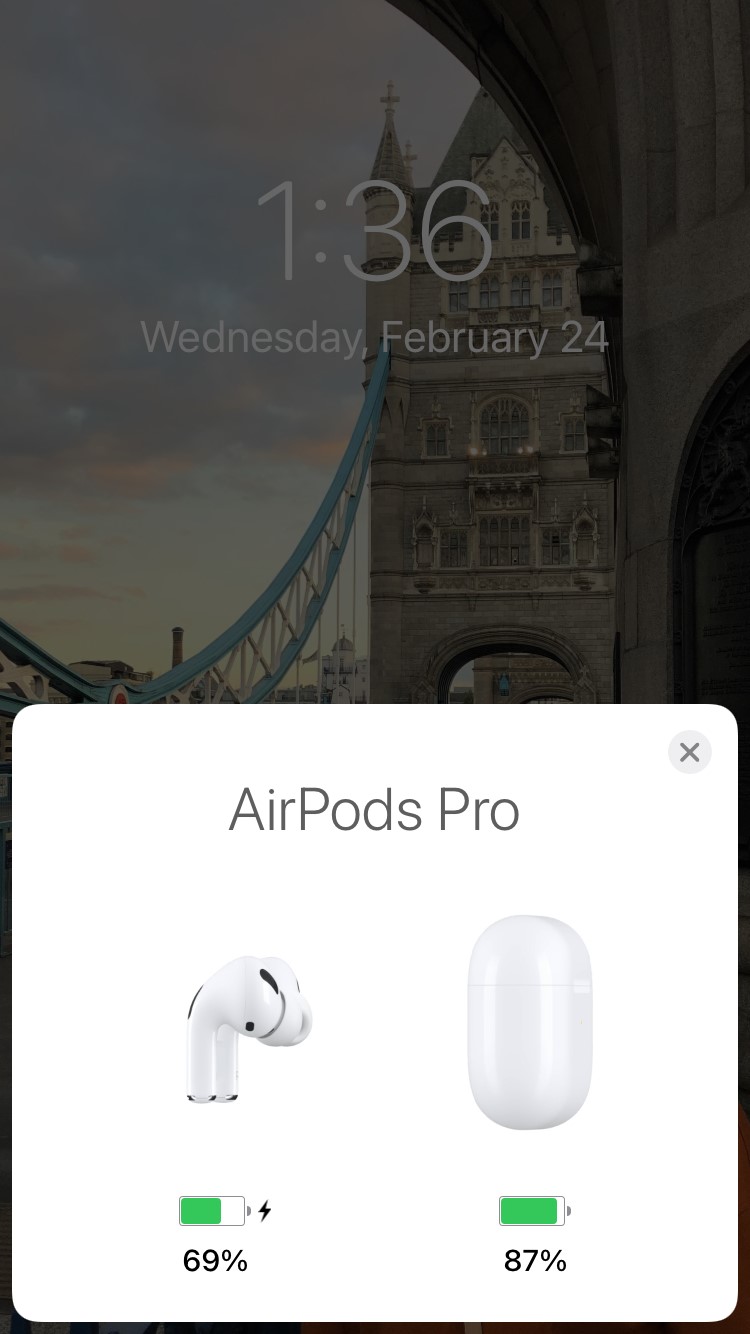
How to Check AirPod Battery Life
Open your AirPod case with the earbuds still inside and hold the case close to your iPhone or other iOS device. Make sure that the AirPods you want to check are paired to your device. You should see a report of your AirPod battery life automatically pop up on your screen. It will look like this:
Check Your AirPod Settings
It’s possible that you have the Active Noise Cancellation setting only on one AirPod, which can make it seem like only one headphone is working. You can check by going into your AirPod settings:
- Go to your Settings, and then tap Bluetooth.
- Tap the blue “I” icon next to your AirPods to access your AirPod settings.

- Under Noise Control, tap the “Off” option.

Now you can put your AirPods back in your ears to see if that fixes the issue.
Reset Your AirPods
If you’re sure that both your wireless earbuds have sufficient battery life but one of your AirPods still isn’t working, try resetting your AirPods and re-pairing them to your phone. Here’s how to reset and reconnect your AirPods.
Reset and Connect AirPods
- On your Apple device, tap Settings, and then go to Bluetooth.
- Tap the blue “I” icon next to the AirPods that you want to reset, which will open AirPod settings. It will look like this:
- Select the “Forget This Device” option.

- Put your AirPods or AirPods Pro earbuds back in the wireless charging case. Close the lid and sit tight for about 30 seconds.
- Press and hold the circular button on the back of your wireless charging case. Wait until you see the light on the front of your wireless charging case start blinking white.
- Hold your AirPods close to your iPhone (or other device) with the top of your wireless charging case open.
- Go to your Settings on your iPhone (or other device), tap Bluetooth, and pair your AirPods.
After following those steps, put your AirPods earbuds back in your ears, and hopefully you’ll hear audio through both ears.
Clean Your AirPods
Sometimes one of your AirPods won’t work due to some dirt or debris sticking to the sensors on the microphone or speaker mesh on the AirPod earbud. Clean your AirPods with a cotton swab first, then test to see if it worked.
Does One of Your AirPods Sound Like It’s Underwater?
If the sound quality on one of your AirPods is super bad, it’s possible you have some water or something else stuck in the speaker mesh. It sounds weird, but if you suck on the speaker mesh, you can remove whatever’s reducing the sound quality.
Personal anecdote: My 16-month baby loves putting my AirPods Pro earbuds in his mouth whenever I’m not looking. I’ll dry the AirPods Pro earbuds, place them in my ears, and at least one of the AirPods will sound terrible. But if I suck on the mesh for a moment, it fixes itself literally every time.
Have Apple Fix Your AirPods
If none of the above works to fix your AirPods wireless earbud issues, it might be time to contact Apple about a repair, or potentially an AirPod replacement. You can either find your nearest Apple Store or Apple Authorized Service Provider, or contact Apple Support over the phone. Either way, make sure to have your wireless charging case ready, which has a serial number imprinted on the inside of the case.
If one of your AirPod earbuds eventually ends up being damaged, you can work with Apple to get replacement AirPod parts. What you pay for the replacement AirPod parts depends on whether or not you subscribe to AppleCare insurance. For example, if you want to get your AirPod Pro fixed, it will cost you $29* with AppleCare. If you don’t have AppleCare, it will cost you $89 per earbud to fix issues. If all that sounds like too much money, you can always invest in a new pair of headphones.
*Costs accurate as of 11/30/2023
More AirPod Troubleshooting
Your AirPods Got Wet
Standard AirPods (first generation AirPods, second generation AirPods) are not waterproof nor water resistant, so some water damage might be the reason you're experiencing problems. If you’ve recently ran in the rain, washed your original AirPods in the washer, or anything like that, you can follow the tried and true steps of DIY water-damage repair.
AirPod Pros, on the other hand, are water resistant. Running in the rain or excessive sweat shouldn’t mess with your AirPod Pros, but dropping them in water might still cause water damage.
Your iPhone Needs a Reboot
If all else fails, you can always just restart your iPhone and see if the issue corrects itself (don’t you love it when technology does that?).
Your Network Settings Need a Reset
Resetting your network settings can help repair issues with your Bluetooth devices. Doing so will erase your saved WiFi networks from your iPhone, so make sure to have all of your old WiFi passwords available. To reset your networks settings, follow these steps:
- Tap “General.”
- Scroll down and select “Reset.”
- Select “Reset Network Settings.”

Find a better phone plan
Thousands of cell phone plans unpacked. All the facts. No surprises.
Related Articles


Find Better Phones and Plans
Hundreds of cell phone plans unpacked. All the facts. No surprises.


 for $0 and $26.20/mo for 24 moths from Bell")


